Possibly the cheapest and quickest home renovation project is painting. To make your painting project look professional, you should be sure to take care of all preparation details, like blue taping edges, removing outlet plates, and spackling any holes in the walls.
Many people skip the spackling step because it prolongs the painting process. The problem with spackling is that it seems to take forever for the spackle to dry. Come on, paint dries faster, right? It’s true that it can take anywhere from 1-24 hours for spackle to completely dry, while paint only takes between 1-8 hours before the next coat can be done.
Why is there such a great variation in timing? And what happens if you do not let the Spackle fully dry?
Contents
What Is Spackle?
Spackle is a gypsum and clay compound typically used by painters and construction workers to smooth out drywall. Its toothpaste consistency is perfect for filling in minor wall injuries, like knicks, dents, and holes. At your local home renovation store, you will find several similar products with different names. Joint compound and drywall mud are two additional names you may come across, but these are not the same thing as spackle. These have a thinner consistency and are used for larger projects, like removing drywall tape lines. What you want to look for is the premixed spackle in a small tub.
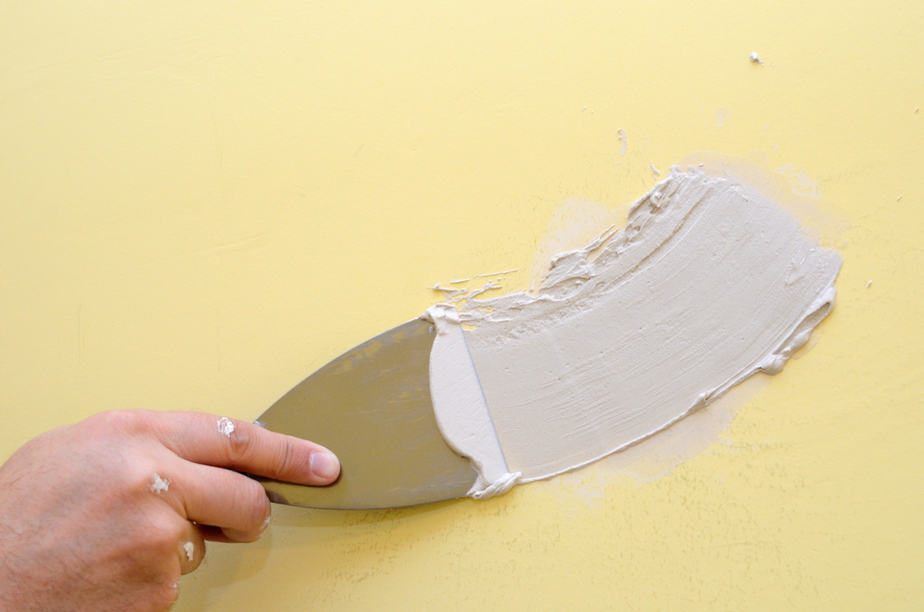
While there are many types of putty knives to purchase, you want to find one with a smaller blade. I wouldn’t suggest anything larger than three inches, and smaller is better. As a home painter, you’ll find that your spackle projects are much smaller and do not require the larger flat blades used by commercial painters and construction workers.
Spackling Process
There are many tips and tricks to spackling and painting. Here, I want to cover the most professional method for fixing those holes in your walls.
- Remove all screws and nails from the wall.
- Gently tap the hole with the rubber base of a hammer or screwdriver to drive the rough edges back into the hole.
(Note: Do not use the hammer head as this could dent the wall.) - Use the putty knife to gently scrape the holes, dents, and cracks for loose debris and paint chips.
- Use a very fine grit sandpaper (such as 350 or 400 grit) to clean any additional protrusions. (Note: You want to make the hole or crack as smooth as possible before spackling.)
- Wipe down the wall with a slightly damp towel
- Gather spackle on your putty knife and angle the knife about 45 degrees to the wall. Applying gentle pressure, swipe down to fill in the hole.
- Using stronger pressure, cross hatch back and forth across the wall to remove excess spackle. (Note: You want this as smooth as possible to minimize your work later.)
- Allow the spackle to dry.
- Beginning at the edge of the spackled area, sand using the same fine grit sandpaper to make the wall smooth.
- Run your fingers over the spackle. If you can still see or feel an indent, you likely need another coat. Repeat steps 6-9.
- Wipe down the wall once again to remove spackle dust, which could cause paint clumping.
Why Does Drying Time Vary?
As with everything, patience is key when spackling and painting. Rushing the job will only cause issues for you later. You’ll find that the spackle will pull back off of the wall and cause streaking. You will see this most often if you are putting a second coat of spackle on the original coat. As you scrape down and cross hatch with the putty knife to remove excess spackle, you’ll see streaks in the spackle where the dry stuff stuck to the knife and pulled free from the wet spackle beneath it.
So, why do the drying times vary so much? Well, environment plays a huge role in this. You know how water takes longer to boil at higher altitudes? Well, humidity and temperature will drastically alter how fast the spackle takes to cure. If it is very cool and humid, you’ll find your waiting period much longer than on a warm, dry day. The water molecules in the air saturate the spackle, causing a slower dry rate. In fact, if you have some old spackle on hand, it’s recommended that you add some water to it to revive it.
Another thing you need to consider is the size of the area you are working on. Edges always dry first, and then curing typically move inwards. If you are spackling a large crack of two feet, it will take much longer than a nail hole. Adversely, if you have a crack to cover, it will dry more quickly than a deeper dent caused by a doorknob. The thicker the spackle, the longer it will take to dry. Also, deeper wounds to the wall will likely need multiple coats, as in the doorknob hole. And, as mentioned before, you’ll want to let each coat of spackle dry between application.
When Can I Paint?
Once you’ve followed all the above steps, you should be ready to paint. What if you’re just fixing a hole and painting over the spackle only? If, and only if, you have the same can of paint on hand from when the wall was painted, you can likely run a brush over the very small area. Even when providing the paint mixer with the same “recipe” for the color, there will likely be a very slight variation in the paint color from can to can. If you intend to paint over many areas or a large area, get a new can of paint and do the entire wall/room.
To prep the wall for painting, I recommend wiping down the entire wall with a wet sponge. This will remove any pet hair, cobwebs, dead bugs, and lint from the surface. If these are not removed, you’ll notice many small bumps and hairs under the fresh coat of paint. If you follow this simple tip, you’ll have smooth walls that look professionally painted.
Spackling Tips
- To tell if the spackle is dry, there is a simple trick. If you can place your finger against the spackle and it does not give or leave a fingerprint, it is likely dry.
- Many home centers sell color-changing spackle that will change from one color (often purple or pink) to white when the spackle is dry.
- Consider using fans or a hair dryer to speed up the process. The hot air will help spackle dry more quickly than the cool air, but you will not need to stand and direct the air when using a fan. Instead, you can move on to the next spackle project.
- If you have an old container of spackle, add a little water to the mixture until it is the consistency of toothpaste. As long as it has no lumps, it should still be good to use.
- If you have a large bucket of spackle (or joint compound for large jobs), add an inch of water to the bucket if you plan to leave it out for a long period. When you come back to it, drain the water off – do not mix it in or it will change the consistency of the spackle and be unusable.
- If filling a larger hole, consider using a spackle that includes acrylic. This will dry a bit softer than lightweight spackle, preventing flaking and cracking.
- You can also find spackle mixed with primer to make painting easier and those repaired spots disappear in the finished product.


