Before I share the steps to creating these adorable name frames, let me encourage you soon-to-be parents out there! Choosing a baby name can be a torturous task if both parents are having trouble agreeing. For others, choosing a name isn’t so bad, but if it is or has been a struggle here are some tips and considerations we used when choosing a name for our three children.

- Decide if any special family names should be considered or if you are looking for a name with a special meaning.
- Be mindful of what baby’s initials will be, what nicknames could be easily tagged to the name, or how the name may be shortened. Are you ok with the nicknames associated with your child’s first name?
- Be thinking of how the first, middle, and last name all sound together. You definitely don’t want your child to have a tongue twister for a name. Also consider if the name sounds choppy (due to too few syllables) or is a mouthful (due to a name with too many syllables).
- Each come up with a separate list of your own. Then share them with each other to compile one list. Each day decide to take one name off the list. *Another option to speed the process is if each parent ranks his or her top 5 choices then discussion can start there. You might be surprised to find a common name that made both of your lists.

Here’s how we managed to agree on names for our children. First, we decided to give each child a middle name that came from our family. So we started with their middle names first. This was an easier start since our family name list is a lot smaller than the list of baby names from a book! (Going through those baby name books can be quite entertaining. Who comes up with some of those names? Either way, it definitely can be your comic relief if needed.)
Our firstborn was a boy, so we decided to name him after my husband’s side of the family. Our second born was also a boy, so we named him after my side of the family. The third time around was a little tricky as to which family to name this child after (since it may be our last and therefore there may not be a chance to even the score). The best thing we did was start this name search before we even knew this child’s gender. We ended up choosing a middle name we loved for both a girl (my side of the family) and a boy (his side of the family). This way when we found out the gender there was no argument as to whose family this child would be named, and it worked out beautifully. No stress; no arguments.
Then we searched the baby name books for their first names. That was harder, but we made some lists and narrowed it down from there. It worked out without any major complications.
Just remember: regardless of how well or how poorly choosing a name is going, the baby WILL come and WILL have a name. Even if in the end there are some reservations or you find out that the UNIQUE name you chose is maybe not as unique as you thought, the name chosen for your child is still special not necessarily because of the certain letters or sounds you chose but because God gave you this child not only to name but to love. This child is special because he/she is YOURS. The name doesn’t “make” the child; the child “makes” the name.
Good luck to all those going through the baby name search. After all that hard work and effort to finding a name, you BETTER BE PROUD of it and find a super cute or fun way to SHOWCASE your decision. So, on to the BABY NAME PROJECT! (Finally!)
What you will need for this project:
STEP 1
-wood/plastic frames (glass removed)
-sandpaper
-black spray paint
STEP 2 (DIY CHALK PAINT)
-acryllic paint for frame color
-cornstarch
-paint brushes
STEP 3
-letters
-acryllic paint for letters (if needed)
STEP 4
-scrapbook paper
-rubber cement

I did this project when I was pretty far along in my pregnancy, so I enlisted help from my handy hubby in order to get these done. (I stayed away from the spray paint fumes.)
1) First lightly rough up the wood or plastic by sanding the surface in order for the spray paint to adhere to the surfaces.
2) Spray paint each frame (don’t forget the sides) black. Let dry.
3) Mix the DIY chalk paint and paint over the black. We had to do 2-3 coats to cover.
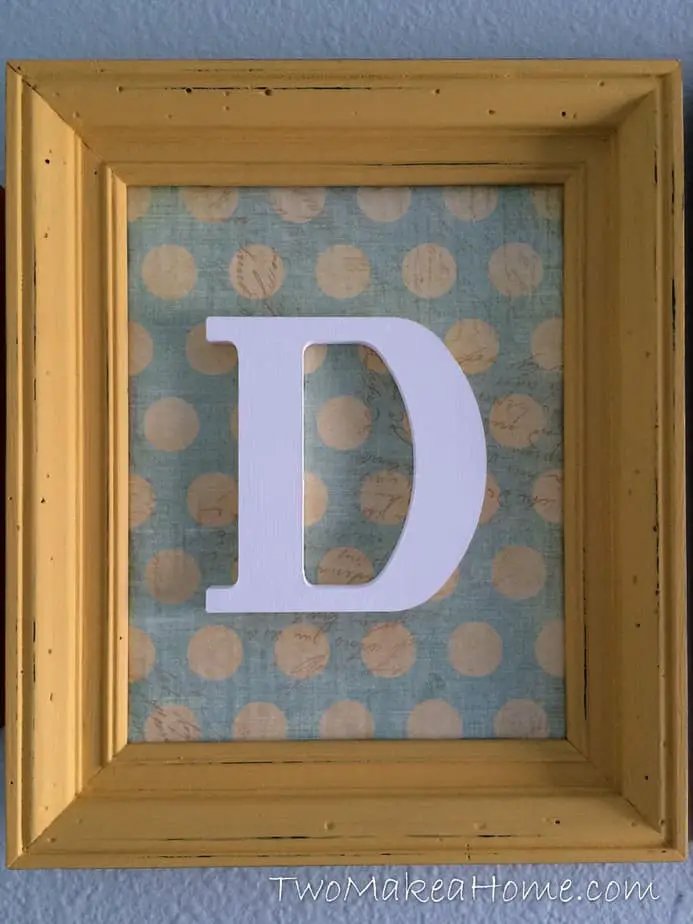
4) At any point, if needed, paint the letters for the name. (I just used acryllic white paint–not chalk paint)
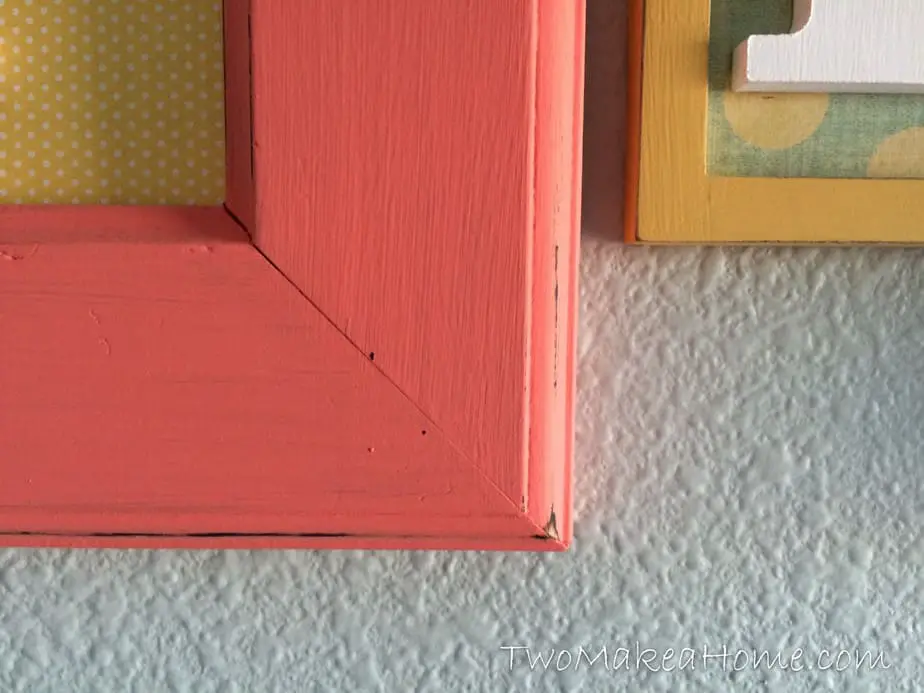
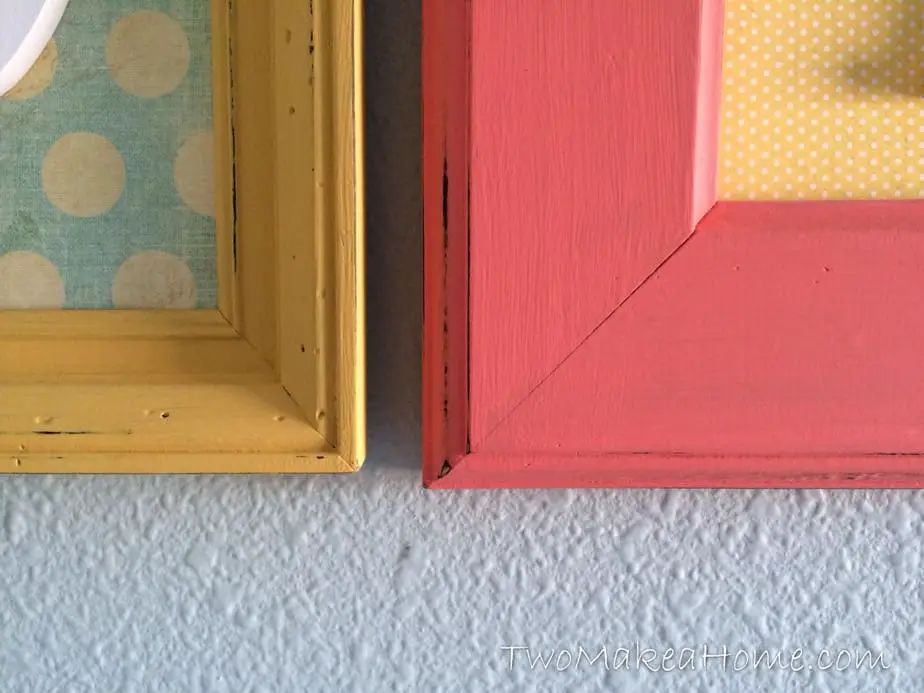
5) Once dry, carefully and lightly sand the chalk paint to expose the black spray paint underneath. You can do as little or as much as you want–depending on how distressed you want it to look. We did a light distressing on these frames.
6) Glue (rubber cement) the scrapbook paper to the picture frame backing. Let dry.
7) Glue (rubber cement) the letters to the scrapbook covered frame backings. Apply pressure. (We left overnight between books to allow a good tight bond. Also did a coat of rubber cement on both the letter and the paper to get a nice bond.)
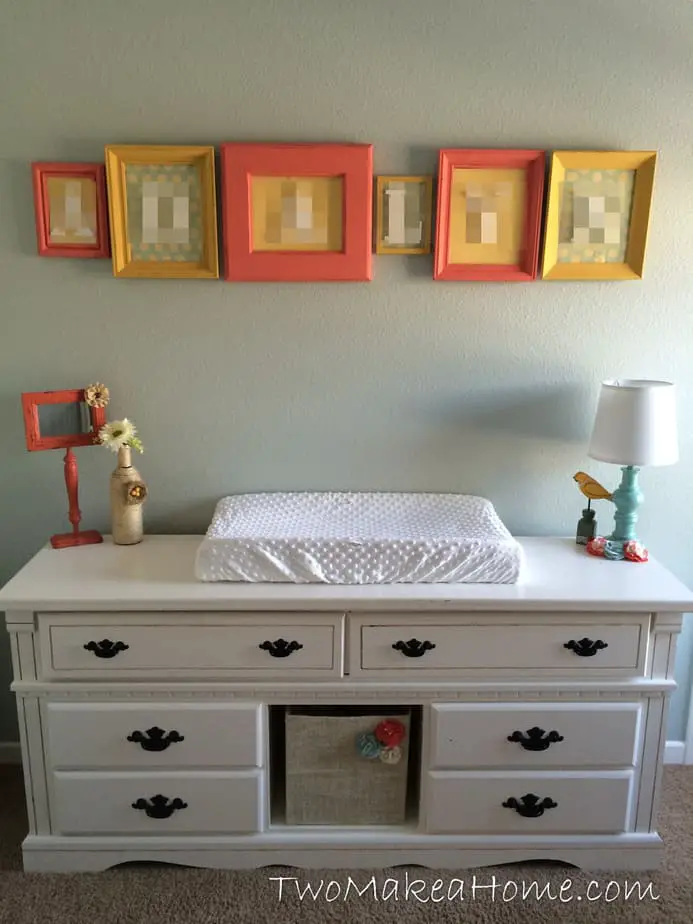
8) Hang them up and enjoy! Let us know how it worked for you.