Whether leaking, clogging, overflowing, or a mystery to you, dealing with broken and clogged pipes is not something that anyone wants to deal with. And figuring out what is wrong, where the problem is, and how to fix it takes a lot of time and gets annoying quickly. Luckily, dealing with a broken PVC cleanout plug is one of the easier problems that you will most likely be able to do yourself. But how do you remove a broken PVC cleanout plug?
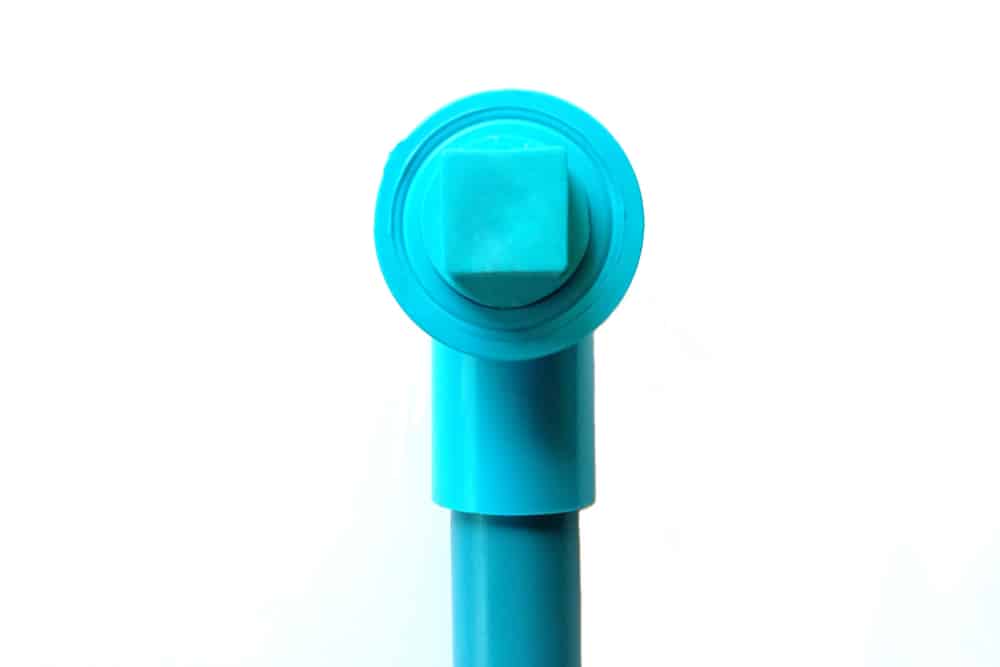
Using a pipe wrench, you will grip the square-shaped nut that is placed above the plug. It will need to be turned counterclockwise to then be removed. After inspecting it for debris, clean it or replace it with a new one.
In theory, the process of removing a broken PVC cleanout plug is simple. However, sometimes the nuts are stuck in place and will seem to not want to turn. Tapping the wench with a hammer can help loosen the nut most of the time. If the plug is stuck in any way, it becomes that much harder to get it off. Keep reading to find out more tips and tricks, and a more detailed process of how to remove a broken PVC cleanout plug!
Contents
What Does a PVC Cleanout Plug Do?
If you’ve discovered that your PVC cleanout plug is broken, a question will probably come to mind fairly quickly, especially if you aren’t familiar with plumbing at all. What does a PVC cleanout plug even do? PVC cleanout plugs play an essential role in keeping the sewage system in perfect condition.
They are essentially access points that allow a person to find clogs and other problems within the sewage system. This would be for something that is deeper in the pipes that using a snake down the drain won’t be able to fix. It also prevents other things from entering the pipes, like rainwater, and keeps the wastewater in the pipes. Another thing that PVC cleanout plugs do is keep dangerous gases and fumes from leaking into homes and just from leaking in general. This is why cleanout plugs are found outside, usually near the foundation of homes, and sometimes near where the bathroom is inside the home.
Warning Signs
There are a few different signs that something is wrong with your pipes. The drains in the house may be draining much slower than usual. It’s also possible that water could be rising from the drain when something else that also drains water is being used. For example, after flushing the toilet water will come up the sink drain or bathtub drain. There also may be a strong sewage smell in your basement, if you have a basement that is.
The number of drains acting up also can help tell you how big the problem is. If it’s just one drain, you should be able to snake it to solve the problem, being careful to follow all directions of course. If it’s more than one drain being strange, the problem most likely is somewhere in the main pipelines, meaning you may not be able to solve the problem yourself.
Removing the PVC Plug
To be able to remove the PVC plug, you have to find it first. As mentioned above, it is usually outside the home, close to the foundation, possibly near where the bathroom, or one of the bathrooms, is inside the home.
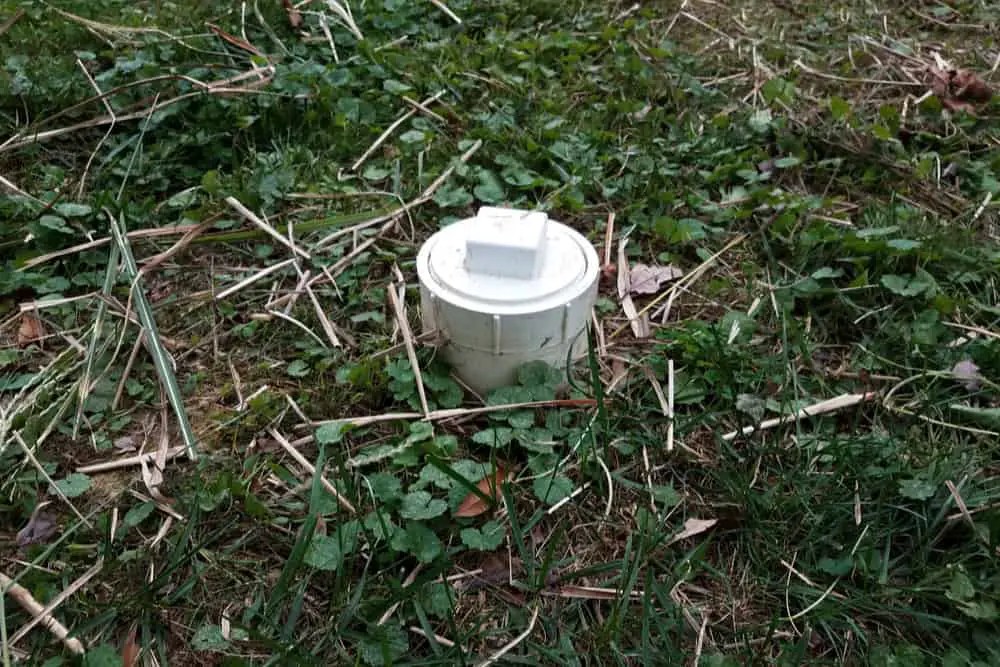
Some stick up out of the ground while others are more buried. Once you have found it, it’s time to figure out how to remove the PVC cleanout plug. Whether it’s broken and needs to be replaced, or just needs to be cleaned and drained, the thing has to come off.
Loosen the Nut
The first step in the process of removing a PVC cleanout plug, whether it’s broken or not, is to loosen the nut. To do this, secure the pipe wrench to the square nut, which should be found at the top of the plug. You will then rotate the plug counterclockwise to loosen it or twist it to the left. There is a good chance that it will be difficult to twist, especially if it has never been removed, so this may require a lot of force on your part. Something that may help is tapping the wrench handle with a hammer.
Screwdriver to Lift Plug
If the nut is broken or damaged, there is a good chance that the wrench didn’t work or that it helped but didn’t get the job completely done. If this is the case, use a screwdriver and force it into the surface of the plug. If a screwdriver is needed, there is a high probability that the plug will need to be replaced anyway. Gently tap the screwdriver until the plug starts to turn.
Inspect
Now that the cleanout plug has been removed, it’s time to inspect it. If the threads are dirty or rusty, scrub them with a brush and water. Soap is not needed, you should be able to get it clean with just the brush and some water. If the plug was cracked or broken in any way, the threads will definitely need a good scrub to get them in good shape again since they may have been exposed to more dirt than they are supposed to. This is also the time when you will be able to see if you need to replace the plug if it did not appear to be broken on the top part of it.
Replace
Once the thread is clean, you can put the plug back on. You can start putting it back on by hand, but once that is no longer able to be done you will need to finish the job up by using the pipe wrench. This is the same process that will need to be followed if replacing the cap with a new one. Careful to not tighten the plug too tightly because then there is a possibility of it leaking.
Plug Still Stuck?
Did you try to get the cleanout plug off with the pipe wrench, tapping on the handle as well, and it still did not budge? If the hammer didn’t help and the plug still has not moved, there are a few other things that you can try. If it comes to the point where you are trying these to get the PVC cleanout plug off, there is a very good chance that the plug will just need to be replaced.
Sometimes if it is just the nut broken and not the plug itself, you will only need to replace the nut. However, after using the amount of force required for some of the options below, you will most likely need to replace the plug if you did not need to already.
The first option, as mentioned above, is using a screwdriver on the edge of the plug and tap the handle with a hammer. This one may take some time since you want to tap around the entire edge before deciding that it didn’t.
Another option to try is heating the PVC cleanout plug with a hairdryer. Especially in the colder months, the plug may just be frozen, though this is a good thing to try year-round. Using a hairdryer, on the high setting should be perfectly fine, the plug should hopefully come right off.
One last thing you can try is tapping the clean-out out plug with a hammer. Instead of tapping the hammer on a pipe wrench handle or screwdriver handle, you will only be using the hammer and using it directly on the plug. The idea is that the hammer will loosen the threads inside to make the plug come off much easier than before.
All of these can be tried in any order and can be done whether the cleanout plug is broken or not.
If you STILL aren’t successful in getting the cleanout plug off, this last option is the last resort! Use a power saw to cut the pipe. This requires more work and much more precision than any of the above options.
Digging down to the pipes, you cut both sides of the pipe. With the pieces of pipe that you have now removed, use them as a guide for the new pipes that you will then be putting in. You will then put the pipe in place and use a new cleanout plug to connect them. This should only need to be done if the broken PVC cleanout plug will not come off even after you have tried everything above.
Because this option is much more hands-on, it may require a person with more expertise at this point. If you do not feel like you are able to do this process with a power saw and working more directly with the pipes, it would be a good idea to get a professional involved at this point.


