Perhaps the most fun part of home renovation is the demolition. If you watch any home reno show, you’ll find that the people beginning the projects get downright giddy about demo. A popular, fairly inexpensive change that many DIYers and professionals tackle is removing old tile flooring to replace it with new flooring. The problem that remains behind is most often a layer of thinset on the plywood subfloor.
With a few tricks, you’ll find that removing this hard thinset is not as difficult as it may seem. Either way, you’ll need patience and the appropriate tools to get the job done. Trying to do it your way to save time or money will not work in this case and will just cost you more in the end.
Before looking at the best ways and alternatives to removing thinset, let’s take a look at how best to remove tile from the subfloor. We’ll discuss what thinset is, which tools work best to remove thinset, and whether it is necessary.
Contents
What Is Thinset?
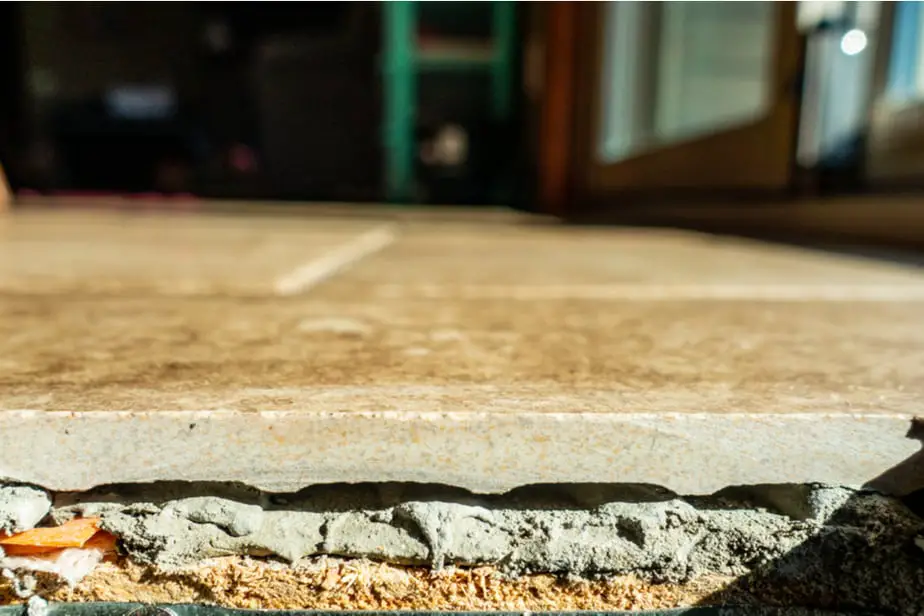
Thinset is the mortar that is used to attach the back of the tile to the subfloor. This is made from water, sand, cement, and other adhesives to make a paste. The main difference between mortar and thinset is that traditional mortar has lime in it. When contractors install tile, they put down a layer of mortar on the subfloor for a cushion. The tile trowel has notched edges on it so that the installer can make neat rows of mortar in the ground.
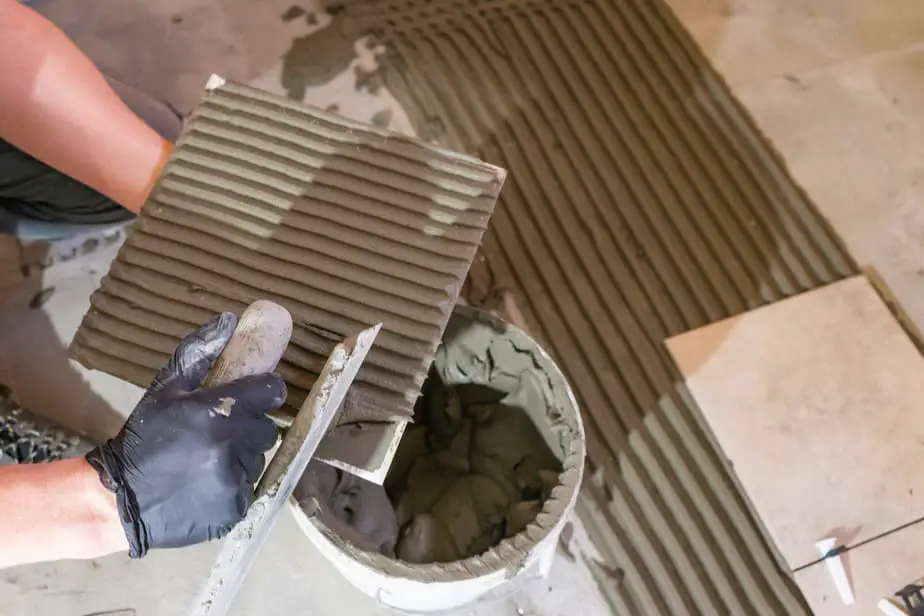
When they “back butter” the tile before laying it down, they run the ridges in the opposite direction to make a crosshatch pattern. This ensures a very strong bond between the subfloor and the tile.
Removing Tile
Because installers back butter the tiles, this strong bond makes it much more difficult to get up old tile. If you ever go at tile with little more than a screwdriver and it pops off in one whole piece, you’ll know that it was never back buttered (properly installed).
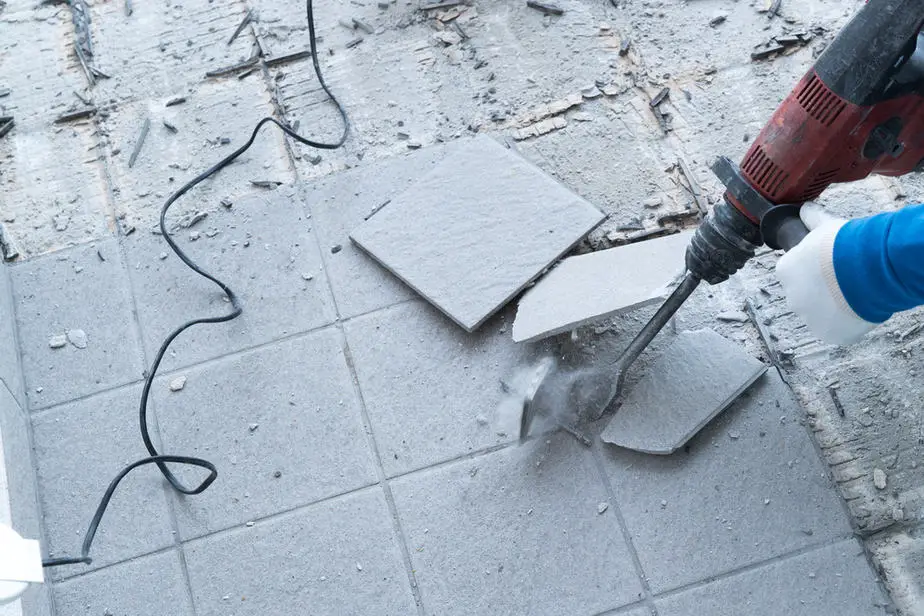
There are two good ways to remove tile: slow or fast. Many people believe that if they use a chisel and hammer to slowly remove each tile, the thinset will come up with it and make for a much easier cleanup. You may find this works, but it takes an insane amount of time to do that, and you still aren’t guaranteed that the thinset will come up with the tiles.
The other option is demolition. Using a hammer, sledgehammer, or an electric hammer drill with a chisel attachment, attack the tile like it called your mother bad names. This will damage the tile, causing it to crack and fly up from the mortar attaching it to the subfloor.
Many DIYers attempt the former method only to realize that they don’t have a decade to complete the renovation. They then turn to the smash method. You’ll need to clean up all the tile shards (be very careful as these can be sharp), but you’ll see the checkered-looking thinset left behind. Now, it’s time to tackle that.
Is Removing Thinset Necessary?
Is removing thinset really necessary if you want to lay more mortar down for new tiles? Unfortunately, it is a necessary evil in home renovation. If you attempt to lay new tile over old thinset, the tiles will not adhere properly, and your floor will likely be funhouse crooked.
The only time you can lay tile on old thinset is if it has been ground down to a completely even and smooth finish. You may find it easier to just remove it though.
You can always replace the subfloor. Plywood is pretty inexpensive and easy to replace with the proper know-how. This is not always in the budget or the realm of possibilities though, so you must know the best methods for removing the thinset from plywood subfloors. There are also concrete subfloors, and you should know which method works best for each.
Removing Thinset from Plywood
Option 1:
The first option for removing hardened thinset from plywood subflooring is to wet it down. If you wet the concrete enough and let it sit long enough to absorb the moisture, you should find that the bond on the wood is not as strong. Consider adding vinegar to the hot water to help break the bond.
Using a chisel/putty knife and hammer, you should now be able to get the thinset up with some patience. This is a slow process and will tire your arms out, but it will cost you little to nothing if you already have the tools on hand.
Option 2:
The next option is to use the hammer drill with a chisel attachment. The vibrations on the floor pop the thinset right off of the plywood, making it a very handy method. Set the chisel end at a 45-degree angle for the best outcome. Using a larger chisel head will make the work go that much quicker. If you don’t own a hammer drill, many home renovation stores rent tools, like these, for a daily fee.
This is the quickest method, and you won’t get soaked getting up the old thinset. However, it will cost you to rent or purchase the equipment, and it is quite heavy, so you’ll still tire out those arms. Also, it is very loud and can cause pieces of tile and thinset to fly around, so you’ll want proper safety gear for your eyes and ears.
Option 3:
The final option that works quickly to remove thinset from plywood subflooring is using an angle grinder. Again, these can be rented from home improvement stores, but you’ll likely need to buy the diamond cut wheel head yourself since this will dull over time.
This method causes a lot of dust, so wear a respirator mask and have a shop vac or vacuum nearby to collect the dust as you grind off the thinset. Many of these machines have a nozzle to connect a vacuum hose right to it for ease. This method is similar to sanding, so you’ll want to apply some pressure to keep the grinder flat as you move it around.
Removing Thinset from Concrete
While it may seem that you would tackle the thinset on concrete subflooring the same as you would plywood subflooring, the different materials mean you need to think carefully. Using a drill hammer could cause damage to your concrete if you use it at the wrong angle. There are two suggestions for removing the thinset from concrete.
The first way is good with plywood as well: the wetting method. Simply wet down the thinset on the concrete and let it sit. Unlike the 30 to 40 minutes you’ll need to let it sit on plywood, the thinset will start to weaken from concrete in about five minutes. You can purchase a scraper with a long handle if you’d like to be able to stand and scrape using body weight as a driving force. Otherwise, you can use the same chisel/putty knife you would use on plywood.
The other way to remove thinset from the concrete subfloors is using a floor maintainer. This can be rented from most stores for a fee. Unless you plan to do many renovations, renting is your best option since this costs quite a bit. It is very large and heavy, so be prepared to put in a bit of effort.
You’ll also want to purchase a diamond disk to use on the drum of the sander. This will get the dry thinset up best, but there will be dust! You’ll simply run the maintainer over the floor similar to a drum sander on a wooden floor. However, keep in mind this will not work on plywood. The force is much too strong and the diamond disk needed to bring up the thinset will chew up your plywood subfloor.


