My grandpa was a woodworker like no one would believe. We often told him that he should sell his creations at festivals for extra money. He loved to build, so why not support that habit by supplementing the cost of the tools he purchased for his projects? One of the tools I loved to check out when I was in his workshop off of the garage was this thing that created angled holes. To me, it always seemed a fun trick to hide the hardware that he needed to build.
That fancy little tool was called the jig, and more than likely, it was a Kreg jig. The Kreg jig is a handy tool that will help you to hide the nails and screws in your woodworking projects. At the same time, it makes very strong joints between the wood pieces. It is a valuable tool for any woodworker, and one of the more well-known secrets of the trade. It is also an excellent tool for beginners because it is quite simple to use.
Knowing how to use a Kreg jig is essential when you’re a woodworker or beginner. There are a few great reasons for using a Kreg jig in your woodworking project. In this article, we’ll discuss what a Kreg jig is, how to use it, and how to adjust the collar.
Contents
What Is a Kreg Jig?
As you’ve gathered by now, a Kreg jig is a tool used to drill holes accurately at an angle. This particular jig is created and sold by the Kreg company. This is a clamp-like device that holds a piece of wood at a certain height so that you can drill a hole at an angle to hide the nails and screws. The best part of this jig is that it allows you to drill a hole into a sturdier part of the wood because the ends of the wood are weaker and can split easily.
Many woodworkers love the pocket hole joints because it removes the necessity for biscuit and dowl joints. With a biscuit or dowl joint, you’ll need to cut a slat into the wood, insert the biscuit or dowl, glue it into place, clamp the two pieces of wood together, then wait for it to dry. With the Kreg jig drill bit and pocket holes, you don’t even need to use glue since the screws create such a strong bond.
This drill bit is fantastic because it is built to create a hole with three parts: the tunnel for the bit and screwdriver neck, the flat end for the head of the screw to sit on, and the pilot hole for the screw thread. This makes the project even more professional and clean.
How Do I Use a Kreg Jig?
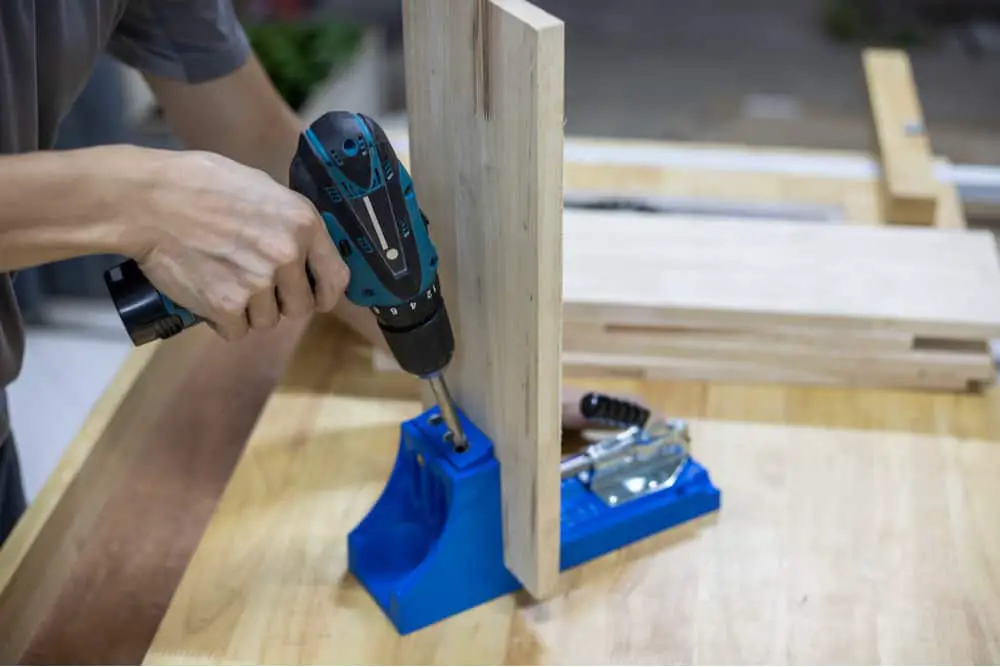
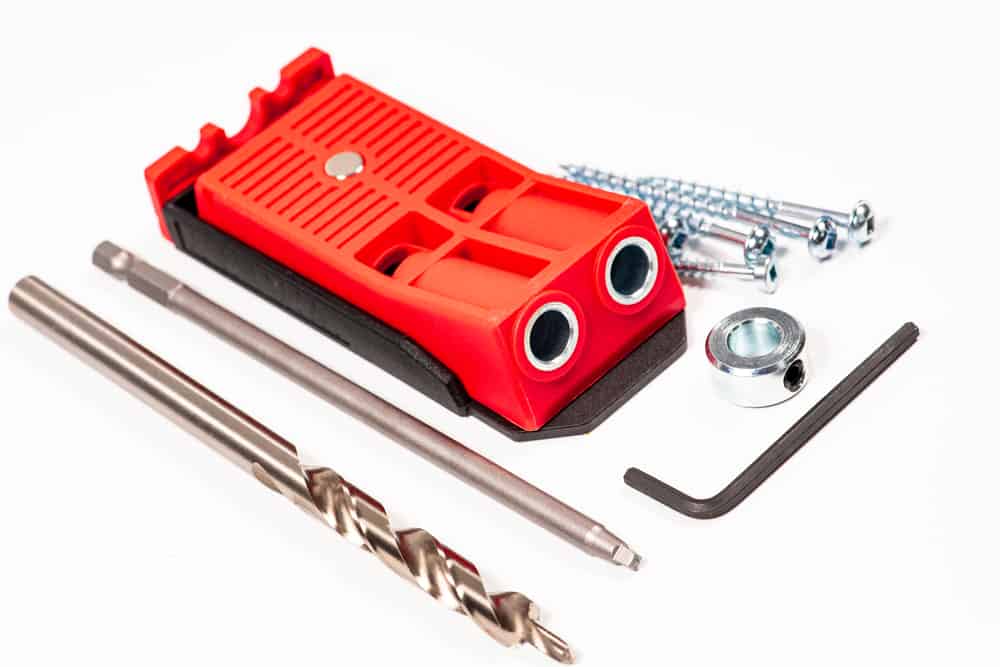
To use this tool, set the collar depth to the depth of the wood you are using. It’s so simple that Kreg refers to it as the “easy-set drill bit.” The collar of the jig has a window that will be moved to the placement of the depth for the drill. Clamp the tool to the wood, then attach the bit to the drill, and get the hole drilled. You’ll guide the drill bit into the steel-reinforced guide, which creates the hole at the exact depth and angle that will work for the pocket hole. The Kreg jig has three holes, which provides an easy measurement for putting two holes in the wood at the perfect spacing.
Kreg recommends using Kreg’s self-tapping screws, which have a square head. The Kreg jig kit includes the screwdriver bit that will fit right into these square-headed screws. These self-tapping screws pull the two pieces of wood together to ensure a tight fit. If you do not use the Kreg brand, be sure it is a reputable brand. You also want to be sure to not use wood screws (which can cause the wood to split when using pocket holes). The Kreg self-tapping screws are resistant to splitting the wood.
What Depth Should I Set My Kreg Jig?
There is no hard rule to what you must set your Kreg jig when working on a project. Instead, you will set your drill bit to the thickness of the wood. Depending on the age or type of your Kreg jig, it may or may not have the depth markings on the actual bit. Older models have the setting built right into the clamp part, which is where you’ll set the collar. The sizes marked on the bit are ½ inch, ¾ inch, 1 ¼ inch, and 1 ½ inch.
A friendly reminder: always measure twice when working with wood. This ensures that human error will not make an impact on the rest of your holes and cuts. Remember, even a slight 1/8-inch mix-up can make a bench uneven or keep a cabinet from closing correctly.
How Do I Adjust the Kreg Jig Collar?
As mentioned before, this is referred to as the easy-set drill bit because it is so simple to set the collar. The little collar, which allows the bit to stop when it reaches the Kreg clamp, has a small window within it so that you can see the numbers beneath. The depth collar looks like a nut that is directly connected to the bit. This guarantees a perfect alignment for the drill bit depth. Simply move the collar up and down the drill bit until you reach the depth measurement. Once you’ve got the collar in place, and the window reads the number you want, use the set screw to hold it in place so it doesn’t slide when drilling.
If it is an older version, the collar setter is molded into the base of the jig. For this version, place the drill bit into the mold. Set the shoulder of the bit (or the flattened end of the drill bit) at the drill depth height. For instance, if your wood is ¾-inch thick, you’ll want to set the drill bit shoulder to 3/4 inches thick. Then, tighten the screw built into the collar to set the drill bit for the correct height.
How Do You Adjust the Kreg Jig Drill Depth?
The Kreg jig drill depth works the same way as the Kreg jig collar. The difference between the drill depth and the collar is just in name. The collar is simply the piece of the drill bit to keep you from going too far into the piece of the wood. However, the guide is another piece of the jig that can be adjusted to help with the drill depth.
For this piece, you first measure the depth of your wood. For example, if you measure your wood and find that it is ½-inch thick, you’ll move over to the depth guide and slide it to the ½-inch thickness. This moves the hole to a specific height so that the drill bit will not go through the wood. The thickness sizes for this are quite vast, so be sure to measure your wood thickness twice to guarantee the correct size. Once you’ve set the guide to the correct height, tighten the hand lock to hold it in place.
Does a Kreg Jig Work on a 2×4?
Yes! A 2×4 is the largest size wood piece that will work with a Kreg jig. Technically, you can work with wood of thicknesses from ½ inch to 1 ½ inch (the size of the 2×4).
What Depth Should I Set My Kreg Jig for a 2×4?
Since this is the largest depth of the wood you’ll want to use with the Kreg jig, you will set the drill bit to 1 ½ inches. You’ll want to set the guide for the proper height at well. This ensures that the hole will be drilled into the strongest point of the wood.
Can You Use a Kreg Jig on 1/2″ Plywood?
We’ve already answered part of this question: you can use a Kreg jig on a piece of wood as thin as ½ inch. The real part of this question that we need to tackle is whether or not you can use a Kreg jig on plywood. Plywood is a common material used in construction and woodworking, which is cheaper than wood.
The layman may think that plywood isn’t technically wood because it is not the prettiest. It does not have the nice grain that we associate with good wood. However, plywood is made up of very thin sheets of wood. These sheets are then laid in alternating order to make for a very strong product. So, since plywood is glued together pieces of wood, will a pocket hole work on it, or will the drill just tear it apart and cause it to split?
Kreg jigs do work on plywood, and they will make excellent holes to connect your joints. However, it is recommended that you use coarse-thread screws. These will work best to hold the plywood in place and ensure that there is no slippage between the layers of wood. Coarse-thread screws will not work as well on hardwoods.
For more tips when working with the Kreg jig, check these out.


