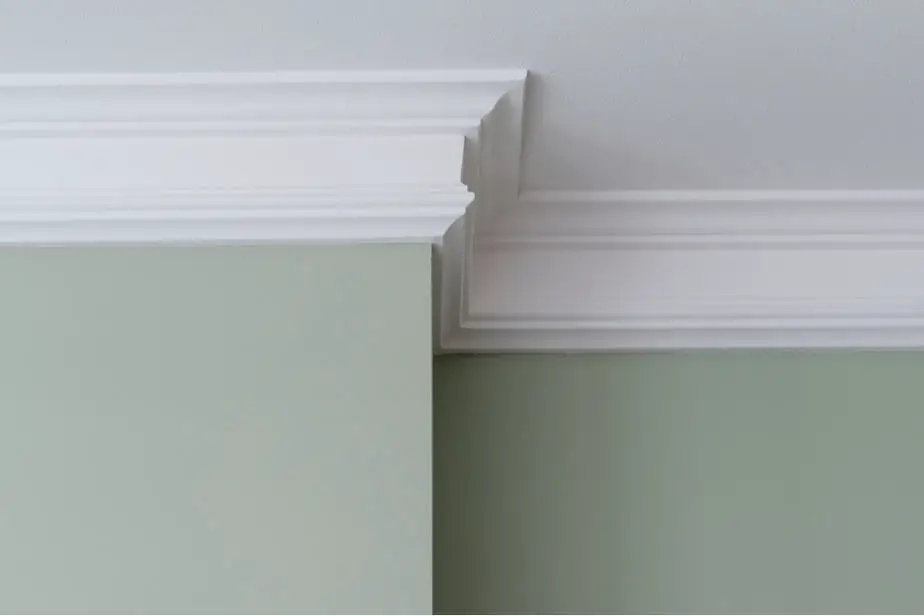
I have a decorating secret pleasure that may seem a little dumb: I love crown molding in a room. There is nothing as beautiful to me as the stark contrast of a painted wall with white crown molding and base boards. I mean, that’s why we frame out windows and doors, right? Of course, you need the painting on both the floor boards and the crown molding to be expertly done, or else that clean contrast will just look messy.
So, when you’re ready to paint your crown molding, you’ll likely wonder if there are any extra steps you should take. Painting crown molding does require a few extra steps, but it can be just as easy as painting a regular wall if you follow these instructions.
What type of paint should you use? What preparation is required? What tools do you use to paint? How do you clean up after you paint? What if your molding is old? There are many questions that are asked when researching how to paint crown molding like a professional. Let’s take a look at how some professional painters tackle this project.
Contents
Paint Type for Crown Molding
There are three types of paint out there: oil-based, latex, and acrylic. Of these three, you’ll want to use either the oil-based or latex paints. Both paints are acceptable on crown molding, you’ll just need to decide what fits better for your lifestyle. Oil-based paints create a beautiful, glass-like finish, while latex paints can range from flat to glossy. Many painters recommend a shinier trim than what the wall is painted (so, if you use eggshell on the wall, consider semi-gloss on the trim). For your convenience, I’ll go over each of them and the pros and cons behind them. It may seem obvious, but most of the cons for one are pros for the other, so just keep in mind what’s important to you.
Oil-Based Paint Pros
- Glass-like finish
- Harder finish
- Scratch resistant
- Water resistant
- Resilient on more surfaces
- Cures more quickly
- Smoother drying
Oil-Based Paint Cons
- Difficult clean up
- Difficult disposal
- More expensive
- Longer dry times
- High VOCs
- Hazardous
Latex Paint Pros
- Inexpensive
- Easy clean up
- Quick dry time
- Low VOCs
- Easy to clean once cured
- Non-toxic
- Comes in several finishes
Latex Paint Cons
- Scratches more easily
- Takes 30 days to cure
- Paint doesn’t always match between cans
- Chips over time
- Cannot use on untreated wood
- Must use synthetic brush
Preparing Crown Molding for Painting
So, you’ve decided which paint to use and have purchased the materials to get started. Are you sure? You’ll want to make sure that you have the correct materials: paint brush, painter’s tape, caulk, spackle, putty knife, sandpaper, rags, ladder, drop cloth, hammer, flashlight, and paint (also paint thinner or mineral spirits if you chose to use oil-based paints). Prep is the most important part of painting crown molding to make it look professional.
- First thing you’ll need to do is hang your crown molding. Already done? Awesome, one step down. Whether or not your crown molding is up, you’ll want to look it over for flaws. If you purchased your home with the molding in place, you never know what kind of job they did putting it up. Some people prefer the easy way out and rely on distance to hide flaws. Get up on the ladder with the flashlight and look for dings, nail holes, cracks, bumps, gaps, and seams. Using the flashlight at an angle will show any nails that could be popping back out or drips of dried paint.
- There are a few ways to do this: inch-by-inch (tackle each issue as you come across it) or step-by-step (tackle one step, like sanding, before moving to the next and repeating around the room). Either way, you’ll want to be very detailed at this point. If you can, bring the hammer with you, and go over each nail hole that seems popped (heck, you may need to replace a nail if the original constructor screwed up). For the paint drips, either mark it with a piece of painter’s tape to come back to on your sanding round or sand it down with some fine grit paper (220+ grit). That will take care of bumps.
- Next: holes, dings, joints, and cracks. You won’t likely need the flashlight for this, unless the room is not lit well. Look for uncovered nail holes, dents, and any joints (where two pieces come together) or cracks. Using a dab of spackle, cover each spot. A lot of spackle is now colored changing color to white as it dries, so this can be helpful to know when it’s safe to sand. Use a putty knife to scrape excess off of the seams/cracks until it is mostly smooth. After an hour or so, sand it down with very fine grit sand paper (320+).
- Gaps require a bit more work. Gaps can happen over time as wood dries and constricts. This usually happens at the joints where two pieces meet and in corners. Depending on the size of the gap, you’ll want to use spackle to fill the hole. If it is on an outer corner, you may need to form the caulk in your hand, like modeling clay, and create a corner for a cleaner look. Once it has dried (which will take much longer than the small holes and cracks), sand it to the shape you’d like. This may take a few applications, but the pay off will be worth it.
- The next step for painting is to wipe down the crown molding. Use a damp cloth and then wipe it down with the dry cloth. If your molding has been up there for a while, you’ll be surprised how high pet fur travels and how many spider webs you didn’t see. This will also remove dust and sanding particles to make sure the paint sticks properly. Note that oil-based paints require completely dry surfaces, so use only a dry towel instead of a damp one and/or wait longer before painting.
- The final step actually may require two steps depending on the age of your crown molding. If your molding has been there a while, it may have been painted several times. The painter may have painted over any silicone caulk that is there. If you’re okay with this unfinished look, simply lay painter’s tape underneath the caulk so you can paint over it as well. If it had been properly sealed and the caulk looks good, lay the painter’s tape over the caulk. This will require a bit more accuracy since it will be slightly uneven. If the caulk is awful-looking, consider taking a utility knife and pliers to pull out the caulk. If this is the case, put tape where the caulk will be laid afterwards. Be sure to tape both the ceiling edge and the wall edge of the molding.
Painting Crown Molding
By now, you’ve set down your drop cloth and stirred your paint. So, let’s get painting! Many home renovation stores sell small buckets to put the paint into for while you’re doing trim work. Pick one of these up (I’ve even been known to use a disposable cup). Use a small angled brush with tapered ends for getting the small areas of the molding. Many of these are short handles for control of the painting process. Some stores even sell detailing brushes for molding that are small and rounded to get between all filigree detailing.
It’s always best to do two coats of paint than one thick coat. Painting one coat will cause dripping, streaking, and take longer to dry and cure. Two coats, with drying allowed between each coat, provides a smooth, professional finish. If you use latex paint, allow about two to four hours between the coats. For oil-based paint, allow at least 24 hours before putting on the second coat. Be sure to ventilate the room well.
Clean Up
Clean up will depend on which paint you decided to use. Latex paint is very easy to clean up. Since it is water-based, you can simply wash the brushes off in a sink using soap and water. Be sure to run the water through the bristles several times until the water runs clear. Be careful with the bristles if you want to reuse the brush for another day.
If you use oil-based paint, fill two tubs with paint thinner or mineral spirits. Do this in a well-ventilated area, since the fumes are intense. Soak the paint brushes in the first tub of paint thinner for about five minutes. Using nitrile or chemical-resistant gloves (not latex), clean the bristles in the thinner. Afterward, soak the brushes in the other tub and repeat the process. At this point, you should have very little paint coming off the brushes. Lay the brushes out to dry fully. If you allow the paint thinner to sit for 24 hours, the solids will drop to the bottom of the tub. You can pour off the clean thinner back into the bottles to be reused.
After Painting
After the painting is when everything will begin to look professional. If you’ve gotten both coats painted, con’t wait quite as long to remove the tape as you did to paint the second coat. While the paint is still tacky, you’ll want to very gently lift off the painter’s tape. If you allow it to dry, you could cause any paint on the tape to pull off paint from the molding. This is a professional painter’s tip to make sure the lines look at clean as possible.
Finally, you’ll want to lay the caulk in the seams to make the walls, molding, and ceiling look like one, beautiful piece. Use a caulking gun and caulk tube to lay a thin bead of caulk along both the ceiling-side and the wall-side of the molding. Use a putty knife (or your finger) to gently ease the caulk in place and remove excess caulk. This will also make it smooth. Now, you’re all done!
Paint Disposal
Okay, so you’re not really done. But you’re almost there. The final step is to get rid of the extra paint. I always keep a small mason jar of the paint in my basement for touchups (over the last six years, I’ve used the set aside paint only once). So, keep some aside if you are concerned you may need a touch up before you choose to repaint. Then, you have to deal with the remaining paint. You don’t want to be one of those paint can hoarders!
If you used latex paint, this is a bit easier to dispose. If there is less than an inch of paint in the can, simply leave the lid off and allow it to dry completely. If there is more than an inch, pour it into a card board box to dry or mix with kitty litter to help it dry more quickly. Leave the lid off of the can, and throw out the dried can.
As mentioned before, oil-based paint is a bit trickier. Since it is oil-based, it is considered a hazardous material. This means that the dry-out-and-throw-out method won’t work. Go online or call your waste management company to find a hazardous disposal site that will take the paint and properly dispose of it. Oh, and remember letting the paint thinner rest for 24 hours? Both old paint thinner and the solids (which you should have saved and put into a separate can) must also be taken to a waste disposal center.


