My husband is always doing small things around the house, but many of these projects are left undone or he’s unsure how to finish it. One example of this was when he noticed one of our pine trees was dying. He thought it was best to chop it down before it fell on the roof during a bad storm. The problem is that we don’t have a wood-burning stove. Sure, we have a firepit, but that would be a ton of wood to keep on hand for the few times a year we have fires.
So, what do we do with all this extra wood now that we have a giant pine trunk at our disposal? Queue up the Internet search! There are a ton of ideas out there that don’t involve using pine logs as firewood. You can use this beautiful natural wood to build several things, from planter boxes to stools.
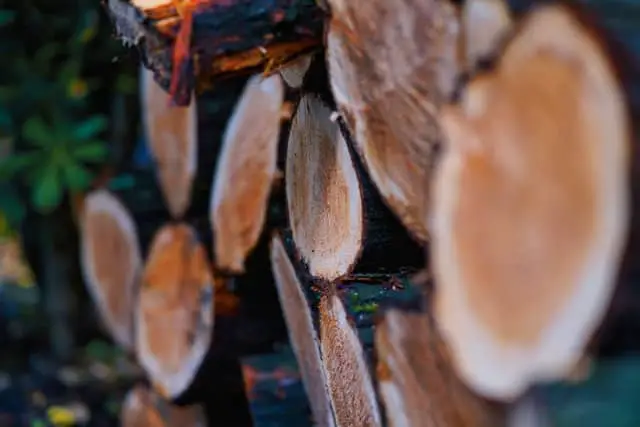
I wanted to share some of my favorite ideas for using pine logs that don’t involve the fireplace. Firstly, pine burns hot and fast, so it’s not the best use for firewood. Secondly, aren’t there some fun, rustic things you’d like to do to keep that tree right where it grew up?
Contents
Swedish Candle from a Pine Log
Okay, I know I just said that I didn’t want to throw this wood into a fire, but this one was something I had never heard of and thought was just too good not to try. Swedish candles are a form of a self-contained fire that is quite entertaining and practical.
With the proper tools, it’s simple to make. Lay a log so that it is standing upright. Using a chainsaw, make four cuts straight through the logs toward the bottom (do not cut to through). This creates a beautiful star effect. Use citronella fluid to get it burning quickly, or stuff some kindling into the cracks.
The great thing about a Swedish candle is that you can take it with you on a camping trip rather than a ton of wood. It’ll burn for hours unlike smaller pieces, and the flat top is the perfect spot to place a camping pan or pot to cook some food.
Pine Dog Bowl
If you have a dog, he likely spends time outdoors. If you have a beagle, like my brother, she never wants to come in, even on hot days. Provide your little (or big) one with a rustic water bowl made from a log. Cut the log as thick as you want to match the height of your pup. Hollow out the center using a hole saw set. Once you’ve made the hole (your choice if you’d like to go straight through or not), sand the edges. Some people prefer to actually make a bowl from the wood, but I prefer using the log as a holder for a metal bowl, that way I can take it in for fresh water and to clean it. Be sure the bowl you select fits the hole and has a lip to hold itself up on the log. If you want to remove the bark, paint it, or carve it this is all your choice.
Outdoor Pine Stools
Outdoor stools made of pine logs are a great way to utilize your logs. If you have a large trunk, measure the pieces to a height you’d like for stools, typically about 24 inches. After the logs have been cut down, sand the edges to prevent any injuries from sharp bark and splinters. If you remove the bark, you can sand it fully down, giving a cleaner look. Purchase or make small round cushions to put on top of the logs. You can leave these unattached to remove in bad weather. Then, just set the stools around your deck, terrace, or firepit for a ton of seating.
Pine Wood Clock
Pine isn’t necessarily the prettiest wood to make a clock face, but you can always paint it if you’re unhappy with the natural wood look. This is a great DIY project you can even do with the kids if you want something fun and memorable. Whatever decision you make, all you need to do is pick up a clock kit from a hardware store or online. These typically come with the hands and mechanics to make them move, and some include the numbers to be affixed. After you’ve sliced the log to the thickness you’d like for your clock (consider cutting it at an angle to showcase the bark), sand it down and prep it with paint, stain, or polyurethane. Once you have a clean slate, you can have fun making the numbers by hand, using stencils, asking your kids to draw them, or use the ones provided with the kit. Then, just follow the directions to attach the hands to the clock face.
Pine Log Stair Railing
A lot of large tree branches are considered logs. If you have a particularly long, straight one, consider using it as a natural railing for your staircase. Of course, you’ll want to remove all twigs sticking out and smooth any larger knots down with a sander. Pine logs can be beautiful with the bark on, but if you want a smooth (injury-free) staircase, consider removing the bark, sanding it down, and adding a few coats of polyurethane to seal the branch. Use several sturdy brackets to attach it to your wall.
Pine Closet Hanger
In the same idea of the stair railing, using a large branch to cut across an open closet can be quite a striking addition to a rustic room. Use a smooth branch with very few knots for this. Trim the edges so that they are smooth and will fit into the brackets of your closet. Remove the bark so that your hangers will glide along the branch easier, then sand everything down. You don’t necessarily need to use a finish on this wood.
Pine Bench
Using two pieces of log can make for great legs to a rustic bench. If you can do the mill work yourself, plane a piece of the log to make a flat slab for the actual seat. Otherwise, purchase a nice size pine board. The size and width are all up to you. Use your chainsaw to miter out a notch in each log that goes about halfway through the log. Make sure to measure twice before cutting, because you want these slots to match each other for a level bench. For extra stability, put a log on either side of the wood so that each end is fully supported.
Pine Flooring
This idea is not for the lazy DIYer. Slice the entire log and large branches into equally thick pieces. Once you’ve done that, place the pieces down on the flooring you are replacing. This can be a bit of a puzzle to get as many of the wood pieces down, but the finished product should have smaller pieces scattered within the larger pieces so nothing looks uniform. Use an epoxy to lay the pieces in place and fill in the gaps between. Be sure to smooth out the epoxy until it is level and smooth. The drying process for this is quite long, so be sure you have the patience and time to let the floor cure. Of course, this also works to use the trimmed pieces as stepping stones outside for a rustic, natural path that doesn’t require epoxy. Just use dirt or small stones as filler between the steps.
Wood Cat Tree
Turn that old, dead tree into a cat tree! This is great if you still have some thicker branches on the tree that can act as braces for the cat beds and platforms. This works best for a smaller diameter log than a large log. Remove the bark and sand this down like crazy until it is smooth and safe for your kitties. Then the fun begins. Use brackets and small branches to attach platforms, hammocks, beds, and hidey holes. You can even add some hanging cat toys from small knots or wrap the branches with jute rope that is used for scratching posts. Make a sturdy base for the cat tree, and let them go to town. The added benefit of this is that if they do scratch the wood, it’s natural on their nails. And really, who cares that if it gets damaged over time? It cost you next to nothing to put together.


