So, you have been living in your home for many years now, and the pinewood floors that came with the house aren’t as flattering as they were when you first moved in. Now you want to either replace the pine with a darker wood, tile, or even carpet, but you want to remove the existing floor first. How can you remove glued-down wood floors from plywood so that you can install new flooring?
Removing glued-down hardwood is not an easy feat, and it would probably be best to pay a contractor to perform the task for you. However, if you are a die-hard DIYer, you certainly can do it but prepare to put in many hours of backbreaking work using tools like saws, prybars, jackhammers, or possibly, a floor-stripping machine. Once you’re finished, you may even have to use an adhesive remover before installing the new flooring.
Just how do you get rid of stubborn, glued-down hardwood floors? It will take a lot of patience because while you want to get rid of the existing hardwood, you have to be careful not to ruin the subfloor. However, here are a few approaches to removing wood floors.
Contents
Why You Should Remove Glued Down Hardwood
The idea of doing backbreaking work to remove the existing hardwood to put down new flooring may not be an exciting thought. In fact, you are probably thinking to yourself, “Why don’t I just leave the existing floor in place and cover it with the new flooring.” In some cases, this may be a good idea, but it depends on the manufacturer’s guidelines.
Sometimes, depending on the type of flooring you will be installing, a manufacturer may require that you remove the old flooring to keep the warranty on the floor intact once it’s installed. If something should go wrong with the hardwood floors during the warranty period, you want to ensure that you have done your due diligence to install the new hardwood correctly, following the manufacturers’ guidelines. Failure to follow the guidelines may make you responsible for any problems that arise with your flooring.
If the manufacturer doesn’t suggest it, there are still some good reasons to remove hardwood floors before installing new flooring. One is that it allows you to see the subfloor. You don’t want to install new floors on top of old flooring that may be hiding moisture problems or other issues with the subfloor. Removing the existing flooring will allow you to see the subfloor’s condition and replace the boards with new ones if you have to.
Another critical reason to remove glued hardwood is that if you intend to install new carpet or hardwood, the extra layer may make your floors even higher. It won’t seem like much of a concern until you try to open doors around your home and find them difficult to open.
Option 1 – Glued Hardwood Floor Removal With A Circular Saw, Hammer and Prybar
After evaluating the situation, you may have reluctantly agreed that it would be best to remove the existing wood floor for various reasons. Perhaps you are tired of that annoying squeak every time you walk over a specific area of the floor and need to pull the floor up and put some new nails in place.
Maybe the age of the house leads you to believe that there may be problems with the subfloor that need to be addressed. Or perhaps the previous point about difficulty opening doors due to having more floor height is something that scares you. After all, who wants to put in tons of work installing new carpet or wood floors only to have trouble opening doors.
So, the most common way to remove hardwood floors is to remove them in sections. Of course, this is assuming that you don’t want to salvage the wood. If you plan to reuse the wood in another area of the house or donate it or even use it for other wood projects, you will have to remove the planks much more slowly and meticulously. This will take longer, but you will have to do it to make sure that you keep the wood intact.
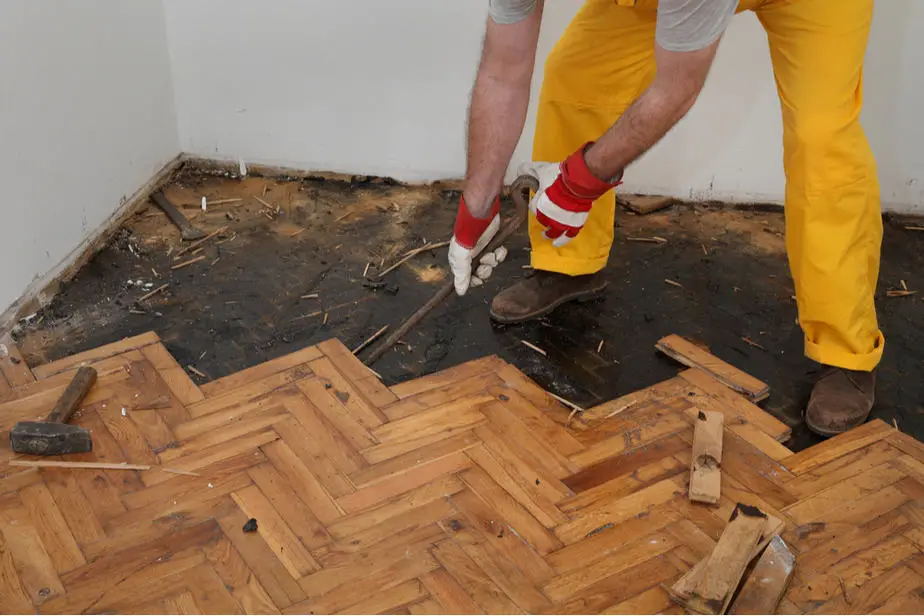
If salvaging the wood is not in the plans, it is still a good idea to carefully use the appropriate tools, including a saw, hammer, and prybar, so that you don’t damage the subfloor. Here’s a unique prybar designed specifically for this job!
First, start with protecting yourself. It may be a good idea to cover your nose and mouth with a mask and put on some goggles to avoid flying debris. If you can work with gloves, it would also be good to wear them as you remove the wood. It will keep you safe from annoying splinters and possibly keep you from jabbing yourself with nails.
After putting on your safety equipment, start by removing baseboards or any molding. Try to remove a small portion of the wood using the hammer and prybar so that you can determine the depth of the floor before using the saw to cut more extensive parts of the floor. Once you know the depth of the floor, you can set your circular saw so that it is deep enough to cut into your wood floors without damaging the subfloor underneath it. It would help to cut the floorboards similarly across the entire floor for uniformity. For instance, if you decide to cut the wood in a five-foot section, aim to do it consistently.
Once you have completed the task of cutting the floors, the next thing to do is remove sections of the floor a little at a time. You can achieve this with a hammer and a prybar. Insert the pry bar under the wood floor, bang it with the hammer a bit and then pop the floor out of place by giving the prybar a push. You should be able to repeat this task until all the wood is easily removed.
However, if the glued-down wood floor is not coming up quickly using this method, you may have to resort to option number two.
Option 2 – Mini Jackhammer to Remove Glued-Down Hardwood Floors
Glued wood floor removal can be a bit tricky. In most cases, it will be easy. However, if the person who installed the wood floors used a type of wood that is difficult to remove, what you will get when you try to pry the wood up is a lot of splintering and breaking of the wood. This is not only frustrating, but it will also leave most of the wood stuck on the floor.
So, if using the old handy saw, hammer, and prybar method is not working effectively, you may have to use a jackhammer.
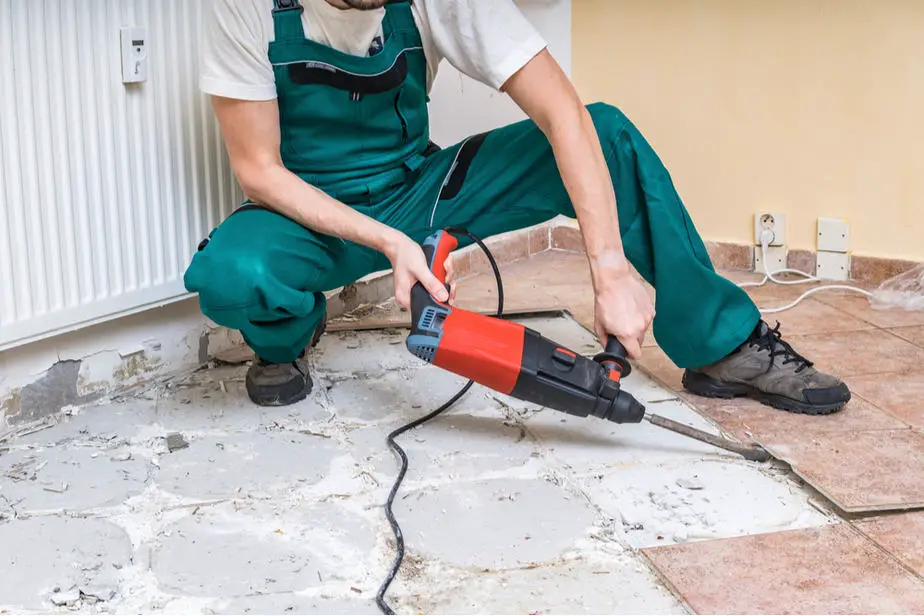
Again, always think safety first when performing these tasks. Keep your face and eyes protected because you don’t want flying debris to injure you during this process. After putting on your protective gear, it’s time to grab a tiny jackhammer and get to work removing the stubborn wood. You can purchase a jackhammer trolley or a traditional demolition jackhammer to get the job done.
Most jackhammers come with various types of chisels. A flat one will likely get under the wood planks and pry them up with less effort than using a hammer and prybar. This method should make wood floor removal easier and quicker than the first method. It may even help remove some of the stubborn glue that remains attached to the floor.
When using the jackhammer, the critical thing to remember is to be careful that it doesn’t destroy the subfloor. Make sure that you are chiseling at an angle to remove the wood floor without denting or damaging the subfloor. The picture below shows a similar method that should be used with hardwood.
Unfortunately, there are times when the previous contractor may have used glue stronger than Fort Knox to install the existing wood floors. So, what you get is a lot of wood debris flying all over the place and minimal wood flooring removed. So, if you have tried the saw, hammer, and pry bar method followed by the jackhammer method and are still not getting the results you want, then it may be time to resort to option number three.
Option 3 – Machines to Remove Hardwood Floors
This method is the most expensive option whether you rent the equipment, buy it, or hire someone to do it. However, if you simply aren’t getting results with the first two methods, you will have to use this method to get the stubborn existing wood off your subfloors. You certainly can leave splintered pieces of wood and glue on the floor when installing your new flooring.
To get this mess up, you will have to use a floor stripper to remove the existing floor, and the chaos left behind from the other failed methods. There are floor strippers that you can push, and there are types that you can sit in and remove the floorboards. Imagine telling your friends and family how easy it was to remove your existing floorboards using a machine that you sit in. You could literally brag about how you sat down on the job and got the backbreaking work done in a cinch.
Removing the Flooring with a Push-Type Floor Scraper
These types of floor scrapers are good at removing various types of flooring, especially the wood floor. Many have adjustable sections to angle your scraper in the right way to make wood floor removal painless. What’s great about them is that the blade may also remove some if not all of the glue that is stuck to the wood and the floor.
As you push these machines across the floor, it gently uses an oscillating blade to lift the wood floor section by section. Some machines are self-propelled, while others move forward as you place your foot on an area designed to give the machine an extra push. When acquiring this machine, try to get a multi-purpose type or get one specially designed to remove hardwood floors.
Getting Rid of Hardwood Floors Using a Ride-On Floor Scraper
Sometimes even a push type of floor scraper may not be able to get the job done. In a last-ditch effort to get the existing wood floors up so that you can install new flooring, you will have to pull out the master of all floor scrapers – the ride-on type. Unfortunately, those stubborn, glued-on floors don’t stand a chance once you pull out this bad boy. You can morph into Arnold Schwarzenegger in the Terminator and tell those stubborn wood floors, “I’ll be back!”
Once you return from renting or buying this type of machine, the wood floors should give in to your tremendous might and power. You may not be able to remove all of the glue, but you should be able to get up most of the wood left behind. You can climb on board this nifty machine and bust up tons of wood in no time. What would have taken several hours to do using the hammer and pry method can be cut down to a few hours with this machine.
With the blade jutting out in front of the machine, you simply start up the machine, climb on board and maneuver it back and forth using buttons and control levers. The machine cuts through the flooring, and you simply propel it forward as the blade, and forward motion do all of the work for you. There is no backbreaking work required. Simply glide across the floor as you effortlessly knock out floorboards, all while keeping your subfloor in excellent condition.
Machines like this don’t rely on your strength like the push-type floor scrapers. Instead, they rely on an engine that provides the mechanical power to remove the hardwood floors effortlessly.
Get the Excess Glue Off The Floor
Whatever method you use to get the job done, there is bound to be a lot of mess on the floor and probably many adhesives still stuck to the subfloor. Therefore, you must try to get as much of the glue off of the floor as possible before installing new flooring.
Most of the adhesive probably came up when using these machines if you used a ride-on or a push-type of floor scraper. However, if you used a jackhammer or the pry bar and hammer method, there may be a substantial amount of glue remaining on the floor. In this case, you will have to use a simple metal floor scraper to remove the excess glue pockets from the floor.
There are a few ways to remove the remaining glue from the floor. One way is to use warm, soapy water. After letting it sit briefly, you should be able to get it up relatively easy using the metal floor scraper. If this doesn’t work, you can try to use a blow dryer or some type of heater to heat the areas where the glue remains. Once the glue is heated, it should loosen up, and then you will be able to scrape it up with the metal scraper. This method is time-consuming but should get the job done.
If neither of these methods works, you may have to resort to commercial strength adhesive removers like Goo Gone. First, you start by protecting the walls so that neither the glue nor the chemical gets on them. Then, you may want to aerate the room with fans and open windows and doors if the commercial product you use has a strong odor. Next, spray the product on the floor in the areas where the glue is and let it sit for how long the instructions tell you to.
Once it’s time to remove the glue, you can use a metal scraper. However, a quicker method that may cover more area is to use a squeegee. Once you remove all the glue and let your wood subfloors dry, you will finally be ready to install your new flooring.


