Two things never seem to be complete on a household chore list: dishes and laundry. When you go to throw yet another load of laundry into the washer, you notice something smells. It’s not the laundry, despite it belonging to your teenage son. This smell is mildewy and a bit rancid.
It never seems to make much sense that things that clean other things need cleaned themselves. Even your Samsung front load washing machine needs to be cleaned on occasion to get rid of left behind odors. Luckily, Samsung front load washers often have a self-clean mode so you don’t have to do a thing!
Is it really that easy? Yes. However, this is not always a guarantee, and you may find that manually cleaning the washer once a year will keep it in even better working order (not to mention smelling better). Let’s take a look at the simplicity of the self-clean mode and how best to manually clean your Samsung front load washer.
Contents
Self-Clean Mode
Samsung front load washers have preset buttons to make cleaning different types of laundry easier. Self-clean is one of these modes. Samsung recommends running a self-clean mode every 40 loads. For a front load washer (some models have LED lights to let you know its time). User manuals will tell you just to press the self-clean button and let the machine do all the hard work. Depending on the model you have, it also may be called the Pure Cycle. A cycle lasts between 1 and 4 hours, so you can set it and forget it. However, there are some tips that homeowners suggest to help out the self-cleaning mode.
- Slip some bleach into the bleach compartment. This will add an additional cleaning element to the scalding water that the machine will use.
- After the cycle, wipe down the tub with paper towels to remove any left behind grit.
- Consider running an additional rinse cycle after you’ve wiped down the drum.
- Of course, it’s smart to leave the door open whenever the washer is not in use to prevent unnecessary moisture.
- For models that have it, clean out the lint gasket, which can hold all sorts of debris on the filter.
- Pull the detergent dispensers out and run them under warm water. Any buildup will need to be brushed away. Do this before the wash cycle to help keep it clean.
Keep in mind that running a self-clean cycle is recommended by Samsung. It uses less water than running a whole cleaning cycle, so it is more energy efficient.
Manual Cleaning
Many machines do not have a self-clean mode, but not to worry. Manual cleaning is good each time you run the self-clean mode or every six months to keep things maintained. A clean machine will stay mildew-free, and it will keep your clothes coming out fresh every time. When you have mold and mildew in your washer, it can transfer the smells and spores to your clothes. There are a few working parts to tackle, so consider each part its own small project.
Dispenser
This part of the washer is usually the dirtiest visually. Over time, fabric softener and detergent build up in these compartments. This looks gross, it can collect bacteria, and it can clog the dispenser so your clothes don’t get all the liquid cleaner it should.
Remove each piece of the dispenser and run it under warm water. Use a toothbrush to clean the dried-on stuff and get it looking new again. If the remaining compartment has detergent left behind, use water and the toothbrush to loosen the soap. Use a paper towel to scrape out remaining chunks before putting the pieces back into the dispenser.
Gasket
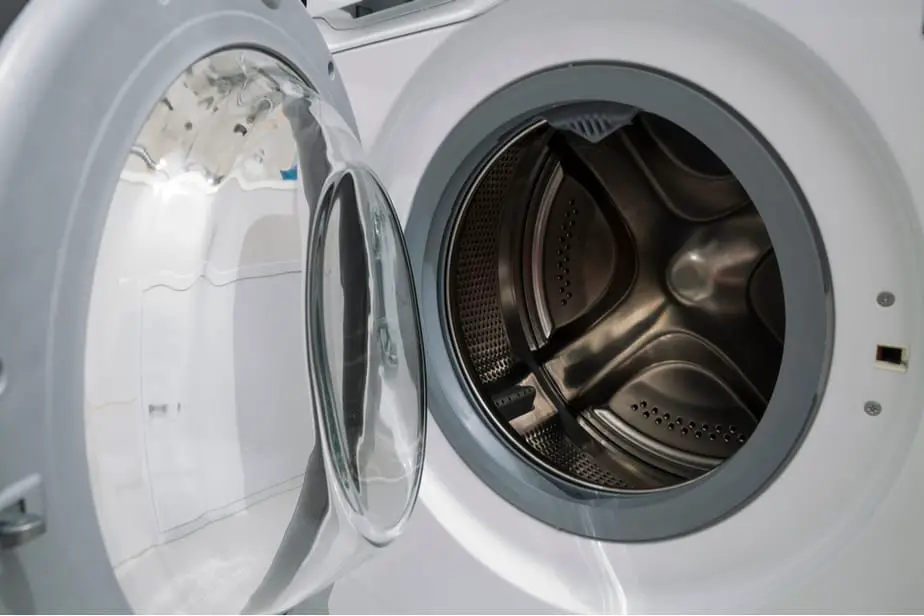
The rubber tube that surrounds the opening of the washer’s drum is the gasket. This holds the door closed and makes it water tight. This is especially important to clean because it is often missed by the self-clean mode, and it is where things typically collect. This is where mildew and mold grow, and a dirty seal can cause an issue with the door seal.
First, pull back the flap of the gasket. Here, you’ll see hair, lint, and all sorts of items you likely don’t want to think about. Using a handheld vacuum, suck out all the loose debris between the flaps. Next, use a toothbrush or paper towel to rub off any stuck-on debris. This is usually where mold will grow, so be sure to look for black spots indicating mold.
Here’s the tricky part- cleaning the actual gasket. Wipe it down with a mixture of water and vinegar. Be sure not to leave excess water behind in the gasket. If you do see mold or mildew (or this is your first time doing this and its pretty nasty) soak paper towels in white vinegar or a bleach to water ratio of 1:10. Tuck the paper towels into the gasket, and leave for ten minutes or longer. These are both effective methods for killing mildew and mold. Be sure to wipe the gasket clean after the paper towels have sat.
Drum
This is the part of the washer that the self-clean mode handles. If you can’t run the self-clean mode or want to do this manually, start by adding baking soda to the drum of the washer. Baking soda cleans the drum, acts as an abrasive material for clinging detergent and oils, removes smells, and helps the metal tub sparkle. How much you add depends on what you feel like, but an entire box will not hurt the machine (and baking soda is an inexpensive product).
The next step will be to add white vinegar to the bleach dispenser. While bleach is a good choice for the self-clean mode, vinegar is better for manual cleaning because it reacts to the baking soda. Again, white vinegar is an inexpensive and multipurpose cleaning gem. The vinegar will remove stains, smells, and react with the baking soda to foam and help lift off debris.
Be sure the setting you use on your cleaning cycle is the fullest and hottest you can set. Also, run an extra rinse cycle to make sure to dissolve any baking soda than may have remained behind from the first rinse cycle.
After the cycle has run, as with the self-clean mode, you’ll want to wipe away any residue with a paper towel or clean cloth. Leave the door open to air dry.
Lint Trap
The lint trap typically is at the base of the washer behind a panel. When you remove this, be prepared to have some remaining water pour out. Keeping a few towels nearby will help for this. Samsung recommends doing this after cleaning the washer as the remaining debris will fall down here.
The water will be hot no matter if you are cleaning it manually or using the self-clean mode, so allow it to cool for an hour before handling. Turning the cap, the remaining water from the wash will leak out. You can then twist the filter out, usually this is done counter-clockwise. You’ll likely see a filmy layer along with hair and lint on the filter screen. Just as you did with the dispenser parts, rinse under warm water, using a toothbrush to remove all gunk. Once the filter is clean, slip it back into place and close up everything.
Exterior
The last step for a deep clean should be to tackle the exterior of your washing machine. Afterall, you want it to look as good as it smells. The best solution for cleaning the exterior of the washer is a soft cloth and mild cleaner. It’s advised in manuals to keep bottles of detergent and items off the top of the washer. This will prevent any scratches from forming and dulling the paint. Once the paint has been scratched, rust follows.
Wipe the outside of the machine with a dry shammy cloth. If there are detergent or other spills on the front or top of the machine, use water or a very mild cleaner. Windex is great for the front of the window to remove fingerprints and streaks.


