At this moment, you are elated because you have completed your tongue and groove pine ceiling installation in your home or on your porch. You did it to create a rustic feel inside your home or give your porch ceiling southern charm. Whatever your reason is for installing tongue and groove pine ceilings, you are now staring at them, wondering whether you should finish them and how you should finish them.
When it comes to pine, it is such a beautiful and alluring natural wood that it almost seems like a sin to cover them with any substance, whether it’s a paint or finish. However, it is a good idea to finish your pine rather than leave it in its natural state.
You must keep in mind that pine is a very soft wood and is vulnerable to just about anything. Natural, unfinished pine is susceptible to discoloration, cracking, and moisture. A finish will help protect from wood oil, dirt, and moisture and keep it looking good for many years to come.
Contents
What is Tongue and Groove Pine?
Before deciding the best way to finish tongue and groove pine, it is best to start with what it is. Tongue and groove pine paneling is a way of fitting wood together in a seamless manner. There is one edge of the paneling that juts out on one side. The other side has an opening for receiving the protruding edge from another piece of paneling.
This technique makes for a much more secure installation than simply putting pine wood planks next to each other. The tongue and groove pine fit together snugly, almost like puzzle pieces. To ensure that the pieces fit together nicely and firm, you can use a wood block and gently hammer it to push the “tongue” part of the wood into the groove. Once your project is complete, you should have wood that perfectly fits with no openings for a gorgeous natural look. It will look like one endless sheet of pine wood instead of separate pieces.
Why is it Installed on the Ceiling?
Tongue and groove pine can be installed on walls and ceilings. It is used on ceilings because it is easy to install, it’s inexpensive, and once installed, it is very aesthetically pleasing. Tongue and groove ceilings make the ceiling appear even and symmetrical. In addition, because the pieces fit together snuggly, you never have to worry about seeing through cracks between the panels.
Many home ceilings have drywall installed in them. The drywall ceilings are usually finished with a type of textured pattern to hide any unevenness. Tongue and groove pine is a unique alternative to drywall that can certainly create a very distinctive look for your ceiling. Most people use the tongue and groove pine to create a rustic look for their cabin or vacation home, but you can also use it in your home to create an alternative textured design for your ceiling.
Why You Should Finish Your Pine Ceilings
After installing your tongue and groove pine ceilings, it may be tempting to leave them in their natural state. The perfectly balanced design is very visually appealing. To finish the pine seems as if it would take away from the natural appearance. However, leaving the pine ceilings unfinished can create more -problems in the long term. Therefore, it would be a good idea to finish your pine ceilings.
The traditional problems with unfinished pine, such as stains from people touching it, won’t be as prevalent with tongue and groove ceiling pine. This is because the ceiling won’t be an area that will be exposed to high traffic. Therefore, you won’t have to deal with fingerprints getting the natural pine dirty. Cracking can become an issue with ceiling pine, however. Since heat rises, the ceiling is exposed to constant warming and cooling, leading to pine shrinking and expanding. To keep your wood from being damaged, using a finish will help.
Although it is recommended that you finish your pine ceilings, keep in mind that this wood is tough to finish. Pine wood can soak up finishes at an uneven rate creating a blotchy finish with the wood. Nothing is worse than having a gorgeous natural pine ceiling that has been destroyed by a finish that appears to be blotchy.
If you do happen to create a blotchy mess with your gorgeous pine ceilings, you can rescue them by sanding them and starting over again. Before applying a finish, you should use a pre-stain wood conditioner to help the finish apply evenly on the wood. To avoid blotching issues with your pine ceiling, it would be best to apply the finish before the installation. This will save you a lot of hard work by seeing the problems with the wood while they are unattached to the ceiling so that you can address them before installation.

How to Finish Tongue and Groove Pine Ceilings
When finishing your tongue and groove pine ceiling, you will first need to decide if you want to have a surface finish or a penetrating finish. A surface finish is a paint finish or any finish that sits on top of the wood. A penetrating finish penetrates the surface of the wood to create a more natural look. Surface finishes are more durable than penetrating finishes, but they don’t look as natural.
Most people will opt to finish their tongue and groove pine ceilings with a penetrating finish. This is because most people like the natural look of pine ceilings and want to preserve them as much as possible. There are many ways to finish pine ceilings using penetrating finishes. Here are the most common types of penetrating oil finishes:
Some people prefer a surface finish. Although some of these can be clear, like penetrating finishes, it leaves a film on the surface that can make it look unnatural. Surface finishes include the following:
- Varnish
- Lacquer
- Shellac
- Polyurethane
- Paint
The type of finish you choose for your tongue and groove pine ceilings is entirely up to you. A penetrating finish will add sheen to the wood but takes longer to dry than surface finishes. On the other hand, surface finishes can have a glossy finish, making the wood appear shinier, and the fumes can be hazardous. Other disadvantages of surface finishes are yellowing over time, peeling (in the case of paint), minimal durability, and failure to prevent moisture damage.
The type of finish you choose will vary widely depending on whether you install your wood indoors or outdoors. Therefore, you will have to consider this when you purchase your finish for your tongue and groove pine ceilings. You can finish your tongue and groove ceilings after they are installed or before they are installed.
The better option is to complete them before because fixing blemishes on the ceiling can cause a lot of strain on your body, and the finish may not be as easy to fix while the wood is suspended from the ceiling. Once you determine when to apply the finish, it is essential to decide which finish you want to use on your ceilings. It is best to sand the wood first to make sure the finish applies evenly for most finishes. Make sure that you get rid of fine sand dust by wiping or vacuuming it away.
Oil Finish
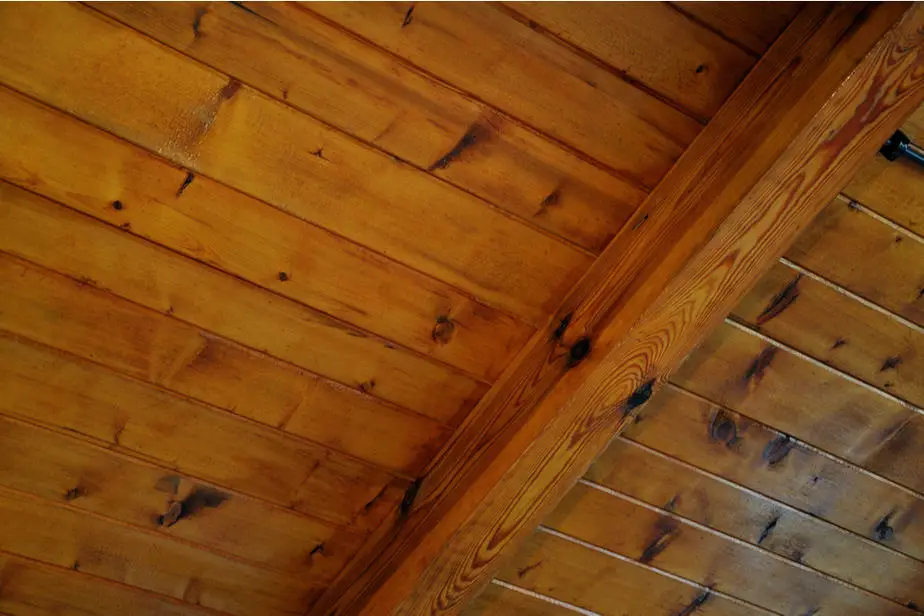
An oil finish will bring out the texture and the luster in the pine wood. However, the color of the pine wood will sometimes darken a bit when applying oil finishes. To apply an oil finish, you typically use a paintbrush or a cloth. Once you apply one coat, you may want to apply another coat. However, it’s best to coat the wood as the product instructs you to do. Drying times may vary, sometimes as little as ten hours or as long as 24 hours.

![]()
Varnish, Lacquer, or Polyurethane Finish
These finishes leave a coating on top of the pine. However, it doesn’t usually darken the color of the pine as oil does unless it is oil-based. Water-based polyurethanes and acrylic lacquers will allow you to maintain the integrity of the natural look more than most other finishes. To apply polyurethane, use a fine brush, cloth, or pad. Again, for best results, follow the instructions on the label. Once you are finished with the rags, dry them completely and discard them to prevent fires and environmental contamination.

![]()
Paint Finish
Although most people would prefer not to paint pine and instead let the natural beauty of the wood show by using a varnish or oil, some prefer to paint pine wood. Perhaps this is because the painted wood will look better with the overall décor of their home. Whatever your reason may be for painting your pine wood, it is best to prime and sand it before applying paint. This will minimize the defects that arise with painting pine, such as uneven coverage and bleed-through.


